
Shaping is one of the most underestimated skills in baking. Many beginners focus heavily on mixing and fermentation — but shaping plays a crucial role in structure, oven spring, crumb texture, and overall appearance.
Even a perfectly fermented dough can bake flat if shaped poorly.
If you want to improve your bread quality and move closer to professional standards, mastering shaping techniques is essential. Let’s break down the fundamentals in a clear, practical way.
Why Shaping Matters
Shaping creates surface tension in the dough.
Surface tension:
- Supports vertical rise
- Controls expansion
- Improves oven spring
- Creates balanced crumb structure
Without proper shaping:
- Bread spreads outward
- Crumb becomes uneven
- Air pockets distribute poorly
Good shaping transforms fermentation into structure.
Understanding Pre-Shaping
Pre-shaping is the first step after dividing dough.
Its purpose is to:
- Organize gluten structure
- Begin surface tension development
- Prepare dough for final shaping
How to Pre-Shape
- Gently turn dough onto the work surface.
- Divide evenly using a bench scraper.
- Lightly form each portion into a loose round.
- Let the dough rest (bench rest) for 15–20 minutes.
During this rest:
- Gluten relaxes
- Dough becomes easier to shape
- Tension redistributes
Skipping this step can lead to uneven shaping.
The Bench Rest: A Critical Pause
The bench rest allows the dough to relax.
If you try shaping immediately after dividing:
- Dough resists stretching
- Surface tears easily
- Final shape becomes uneven
Patience during bench rest improves results dramatically.
Basic Round (Boule) Shaping Technique
The boule is one of the most common artisan shapes.
Steps for Shaping a Boule
- Place rested dough smooth side down.
- Gently stretch the edges toward the center.
- Rotate and repeat, creating a tight structure.
- Flip the dough seam side down.
- Tighten further by gently dragging against the work surface.
The goal is to create:
- Tight outer surface
- Even internal structure
- Balanced tension
Avoid over-tightening, which can tear the surface.
Basic Oval (Bâtard) Shaping Technique
The bâtard is slightly elongated.
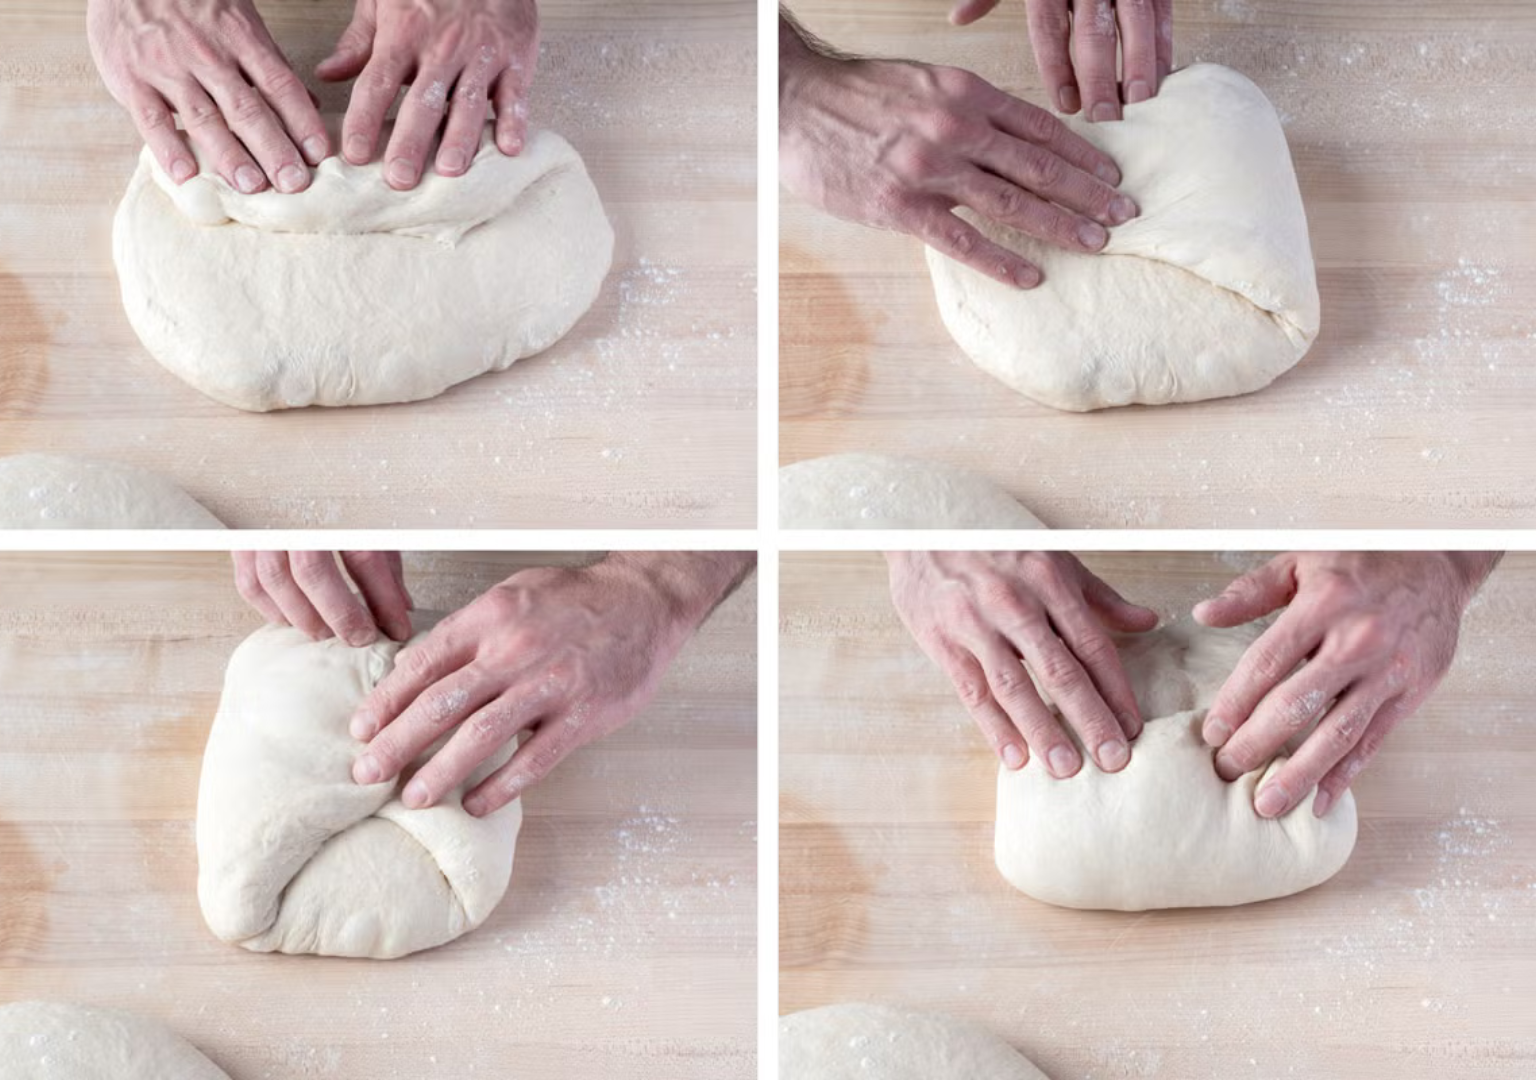
Steps for Shaping a Bâtard
- Place dough smooth side down.
- Gently flatten into a rectangle.
- Fold top third down.
- Fold bottom third up.
- Roll gently to create an oval.
- Seal seam carefully.
This shape promotes strong oven spring and works well for scoring patterns.
Building Proper Surface Tension
Surface tension is created by:
- Gentle stretching
- Controlled folding
- Firm but delicate handling
Signs of proper tension:
- Smooth outer skin
- No visible tearing
- Slight resistance when pressed
Too little tension → flat loaf.
Too much tension → torn surface.
Balance is key.
Avoiding Common Shaping Mistakes
Beginners often:
- Use too much flour on the bench
- Handle dough too aggressively
- Skip bench rest
- Fail to seal seams properly
Too much flour prevents tension from forming.
Rough handling deflates valuable gas bubbles.
Gentle confidence works better than force.
Handling High-Hydration Dough
High-hydration dough (70%+ water) can feel intimidating.
To shape effectively:
- Use minimal flour
- Work quickly but gently
- Use a bench scraper for support
- Maintain confident hand movements
High-hydration dough requires more experience but produces beautiful open crumb.
Practice gradually.
Using Proofing Baskets (Bannetons)
Proofing baskets support shape during final fermentation.
They help:
- Maintain structure
- Encourage upward rise
- Create defined scoring patterns
Place shaped dough seam side up inside the basket.
When baking, invert onto baking surface so the seam faces down.
Developing Muscle Memory
Shaping improves with repetition.
To build skill:
- Practice the same shape multiple times
- Focus on consistent tension
- Compare oven spring results
- Record observations
Muscle memory develops through consistency.
Professional bakers shape dozens — sometimes hundreds — of loaves daily.
Repetition builds precision.
Shaping and Crumb Structure
Shaping influences crumb pattern.
Loose shaping may produce:
- Large irregular holes
- Uneven crumb
Tight shaping produces:
- Controlled air distribution
- Balanced crumb
- Even rise
Understanding this connection helps refine technique.
Timing Matters
Shaping should occur:
- After sufficient bulk fermentation
- When dough feels airy but structured
If bulk fermentation is incomplete:
- Dough feels dense
- Shaping becomes difficult
If over-fermented:
- Dough collapses
- Surface tension is weak
Fermentation and shaping work together.
Practicing at Home Efficiently
To improve shaping:
- Bake smaller batches more often
- Practice both boules and bâtards
- Analyze crumb after each bake
- Watch how shaping impacts oven spring
Intentional repetition accelerates growth.
Professional-Level Refinement
As you improve, focus on:
- Consistent loaf size
- Uniform seam sealing
- Even symmetry
- Confident hand movements
Professional bakers shape quickly without hesitation.
Confidence comes from practice.
Signs You’re Improving
You’ll notice progress when:
- Loaves hold shape well
- Oven spring increases
- Crumb becomes more balanced
- Scoring opens cleanly
Improvement happens gradually — loaf by loaf.
Final Thoughts: Shape with Purpose
Shaping is not just cosmetic.
It defines:
- Structure
- Rise
- Crumb
- Appearance
- Professional presentation
If you want to elevate your baking from beginner to serious level, invest time in shaping practice.
Slow down.
Focus on tension.
Respect the dough.
Build consistency.
Over time, shaping becomes intuitive.
And when that happens, your bread will look — and perform — like it came from a professional bakery.
Keep practicing.
Great structure starts in your hands.